Expensify is a leading expense management platform that lets organizations track expenses, submit expense reports, pay bills, and generate invoices. In this article, we will walk you through the installation steps for integrating Expensify with Freshteam.
TABLE OF CONTENTS
Pre-Installation Read-Me
- Installation Guidelines
- Viewing Synced Employees on Expensify
- Post-installation usage guidelines
- FAQs
Pre-Installation Read-Me
Before you set up the integration, please note the following -
Expensify Policy Condition - You need to be on an Expensify Control / Collect policy in order to successfully integrate.
Employee ID Condition - Please make sure that all your employees on Freshteam have an Employee ID, since that is a mandatory field to successfully sync data between Freshteam and Expensify.
1-Way Sync Caution - This is a 1-way sync from Freshteam to Expensify, so once you set up the integration, please make sure that you do not edit any employee data directly on Expensify.
Freshteam > Expensify Role Matrix - Depending on the hierarchy in Freshteam, the employee will automatically be assigned a role on Expensify, as displayed in the table below -
Know more about Expensify User Roles - https://community.expensify.com/discussion/5648/deep-dive-policy-users-and-roles
Installation Guidelines
1. Go to Settings > General Settings > Integrate with other Apps > Apps
2. Search for Expensify from the search bar on the page or find it under Time Tracking, Accounting & Billing in the Browse by Category Section.
3. Once you open the Expensify listing, click on the Install button under the Expensify icon to initiate the installation, you will be redirected to the configuration page.
4. The configuration page is divided into 4 parts: Connect Freshteam, Connect Expensify, Configurations and Failure Sync Log. Connect Freshteam
5. On the Connect Freshteam tab, enter your Freshteam domain URL in the Freshteam Domain field. Copy and paste your Freshteam API Key, which you can find by clicking on your profile icon at the top-right corner of the screen. Check the Freshteam Plan Confirmation box only if you are on a Paid Freshteam plan. Click on Next.

6. On the Connect Expensify tab, enter your Admin email ID. (Note - You must be a Policy Admin). On Expensify, to generate your Partner User ID and Partner User Secret, follow the instructions under the Authentication section of this help article - https://integrations.expensify.com/Integration-Server/doc/. Copy and paste your Partner User ID and Partner User Secret and click on Next.
Note: Record the credentials in a safe place as Expensify only shows them once. 

7. On the Configurations tab, you will be able to see the following:
a. Whom to Sync - This is where you decide if you want to sync all employees from Freshteam to Expensify, or specific employee subsets. Once you make your selection, you can click on Show Employees to view the employees that are going to be synced. Once you’re done with this, click on Advanced to choose what data to sync, and when to trigger a sync.

b. What to Sync - This is where you decide which employee fields you want to sync from Freshteam to Expensify. Once you’ve selected the fields, click on Next.

c. When to Sync - This is where you decide which employee events you want to trigger a sync at - create / update / terminate or all 3. Once you’re done, click on Save and then Install. Once you’ve completed the 3-part configuration, click on Install to complete the integration set up.

Note: If this is the first time you are installing the integration, it can take upto a day for pre-existing employees in your Freshteam account to appear in your Expensify account. Any new employees added, updated or terminated on Freshteam after this first time installation will be synced in Expensify instantaneously. Viewing Synced Employees on Expensify
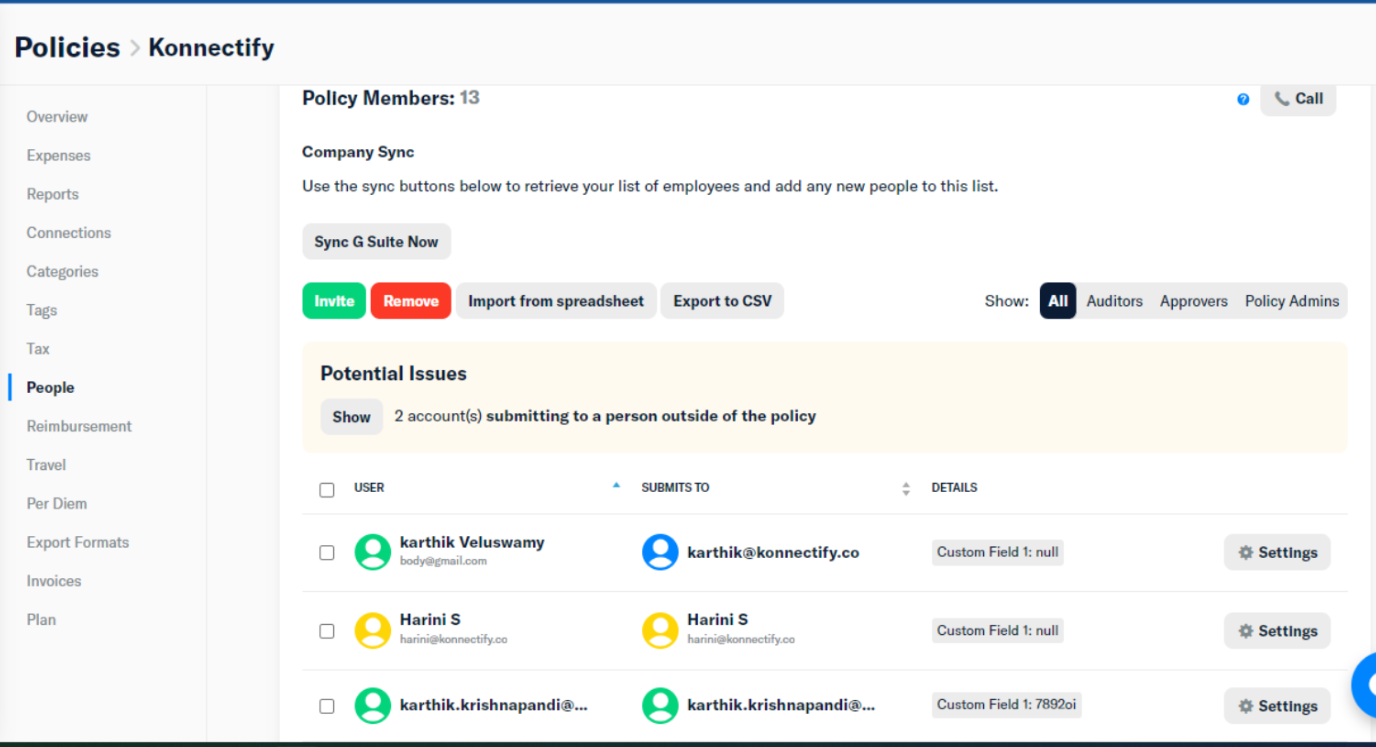
1. Go to Policies > Your Policy > People to view the employees that have been successfully synced.
2. The reporting manager on Freshteam will appear in the "Submits To" column in Expensify
Post-installation usage guidelines
1. Onboarding Employees onto Expensify - When you install the app or create a new employee, the employee will receive an email from Expensify to set up an account. Please make sure that you inform the employee to check their email and set up their Expensify profile.
2. Updating Employee Data - Whenever you create / update / terminate an employee on Freshteam, the employee record will be automatically updated on Expensify. However, you have to make sure that the integration is configured appropriately (review the Configurations section under the Installation Guidelines for a reminder on how to choose when data is synced).
3. Updating Integration Configuration - To update the configuration settings of the integration, go to Settings > General Settings > Integrate with other Apps > Apps > Installed Apps and click on the Settings icon to update the settings. Make sure you click on Save for your updated configurations to take effect.
FAQs
No, only Collect and Control policy holders can integrate with Freshteam.
- How do I sign-up for an Expensify account?
You can sign up for an expensify account here - https://www.expensify.com/
Please reach out to support@freshteam.com for any issues with your Expensify integration.